Monday, January 31, 2011

Crayon Crafts

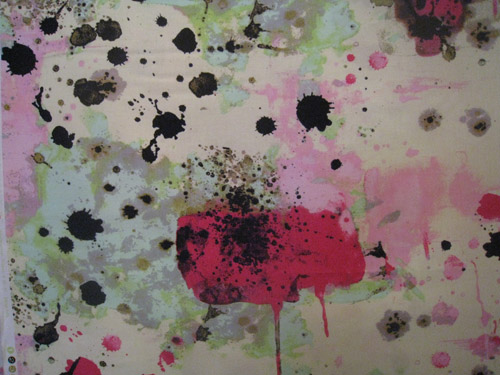
Here is a great project coming to you from Better Homes and Gardens Stitchery and Crafts 1966. In this project you are to use the techniques of crayon overlay, crayon scratchboard and crayon transfergraph.

They have used different drawing as cities as their examples. For the Tokyo picture they used the scratchboard technique. In this you sketch your design, re-draw them using India Ink and color them in with crayon. Then you apply a thin coat of paint or ink over the design and when it is dry scratch it off with a pointed tool.
Rome was done with crayon transfergraph. To do this you apply colored chalk to a sheet of drawing paper. Then apply a layer of white wax crayon over the chalk. Then add another layer of wax crayon over the white layer. When this image is ready place a sheet of paper on it and use a hard pencil to redraw the picture on this new sheet of paper. This will transfer the color to the new sheet. How fun is that?
For Istanbul they used an overlay technique. First they painted their design with smooth tempera paint. then when the paint dries crayon is applied over all the areas. Once you are finished with the crayon you then scrape it off giving the image interesting texture.

Admittedly the article goes into more detail about the techniques and if you are interested in any of them let me know and I'll give you the whole shebang. It's kind of a cool craft idea though, one I found unexpected. Has anyone worked with crayon crafts before?

Friday, January 28, 2011

New Fabric!

Yesterday we were hit with a whirlwind of boxes and got some gorgeous new fabric from the likes of Jay McCarroll, Denyse Schmidt, Kokka and Melody Miller. We also got two large boxes of new books and stationary. Needless to say, it was super exciting at the store yesterday.

First of all, we have Melody Miller's Ephemera from her awesome line Ruby Star Rising. I know, I can hear you asking about the other wonderful patterns from that line. They are coming, I promise. They are on backorder but should come to us next month. In the meantime this print is amazing, and I know you will love it. See it here
We also got in other Kokka prints. I am so obsessed with this floral print, it really fires my imagination for projects. This is something you should come in to see, it is very striking.
This is a very cute print, I am a sucker for sewing and notion prints.
This Russian-esque print is E's favorite. And why not? it has castles, carousels, hot air balloons and Ferris Wheels. What more could you want in a fabric?
Ah, and we come to the Miriporum. This will push you full throttle into Spring dreaming. It has the perfect yellow/pinks/ and teals. We first thought it would be a great skirt, but I think a jacket would awesome out of this as well.
And Denyse Schmidt voiles! They are so 1930's, e and I were immediately planning on copying some of our vintage dresses with this fabric. She loves the Diamond Chevron, but I'm kind of partial to the Greenfield Hill.

And finally we come to the Jay McCarroll. Which I love. Once again, E and I fell in love with different prints, she can't keep her hands off the Raise the Roof, while I am have had the Drop Cloth print in my head for 24 hours. My head keeps running through dress styles, coat styles, and skirt styles. I think I finally narrowed down what I want to make with it though. Now, to add it to the project list.

wee wonderful giveaway

According to the random number generator, Carolyn is the winner of the Wee Wonderfuls book! Congratulations! Contact me and let me know your info so you can get your book. For those of you who didn't win, we are planning on having a lot more giveaways so there will always be another chance.

Jack Lenor Larsen

Today, my friends, I have some eye candy for you. The kind that makes your eyes bug out and leaves you speechless with longing. (That could just be me, but I would wager a few of you will agree) Today we are looking into the world of Jack Lenor Larsen.

Larsen started his textile design house in 1952 in New York and quickly made a name for himself with his hand-woven fabrics of natural yarns. The random repeats of the patterns in these textiles spoke to mid-century design enthusiasts and he has been a leading textile designer ever since. His interest in weaving and textile crafts have helped introduce Ikats and Batiks in the world of design. However, it's his 60's and 70's work with velvet that makes me swoon.

What strikes me with the velvets is the intense jolt of color. Don't get me wrong, his linens and other wovens are gorgeous and I would quite happily fill my home with them, but my heart will always belong to total color saturation.


In 1997 the firm Larsen Incorporated merged with Cowtan and Tout who are keeping the Larsen name alive with hand woven textiles, silks and hides.

For more information and pretty pictures, check out the Minneapolis museum of arts website on Larsen. (It has a great archive of fabrics divided by decade) Also check out the Longhouse website, where you can read about his arts-inspired house and sculptural garden project.

Thursday, January 27, 2011

Daisy Janie frame

It's getting that time again, Valentine's Day. Instead of coming up with something red, pink and glittery for your special someone how about something both cool and useful? Like a patchwork fabric frame? I made mine out of Daisy Janie fabrics, with a little Kaffe Fassett shot cotton thrown in and I love how it turned out.

. If you have any questions about the instructions (and there is a good chance of that) just email me and I'll answer.

Materials: For the front
1/8 (A)
⅛ (B)
⅛ (C)
1/8 (D)
5/8 yard of piping

For the back
1/2 yard for outside back (E)
1/2 yard for inside back (F)
Ribbon one
12 inch dowel rod

Start by cutting the pieces for the front. (A) Cut 4 pieces 4x 4 1/2 (B) Cut 4 pieces 3x4 ( C) Cut 2 pieces 2x4 (D) Cut 2 pieces 6 x 4 ½
Cut your pieces for the back. (E) Cut 2 pieces 12x8 (F) Cut 2 pieces 12x4 Use a 1/2 inch seam allowance

You will start by stitching together your pieces for the front of the frame's top and bottom strips. Arrange pieces in order of A, B, C, B, A. Starting at the left side take pieces A and B and lay them right sides together and stitch down the 4” side. Do the same with piece B to C, C to B and B to A. You will now have the top strip of your frame. Do the same for your bottom.

Here is your ABCBA stripYou see in this picture piece A lined up edge to edge with piece B, right sides together. Granted, you can't see piece B as it is under A, but you get the idea.

When your top and bottom strips are ready it is time to attach them with piece D. We will start with your top strip. On the left side of your strip you will match piece D to piece A at the 4 1/2" side, right sides together. Stitch. Do the same on the right side of your frame.
Here you see piece D right sides together, short side matching with piece AAnd here is what you will see when you press piece D open after stitching to A. When you have the top strip stitched to both D panels, add the bottom strip in the same manner. You should now have a patchwork square with an open square in the middle. Be sure that you have pressed open all of your seams. Now fold over 1/2 seam all around the open square and press to the inside. Now it's time for piping!

Take your piping and cut it into 5 1/2 strips. Pin a piping strip to one side of the open square. The edge of the fabric should but up to the cord of the piping. Stitch along the edge of the fabric...if you have an edgestitch foot, now would be a great time to get it out.


Here is the front of your frame after you have finished with the piping. You are almost done, now for the back. (One possible confusing note about the back. I was trying to be a good sewist and use scraps in this project and my piece E is shown with 2 fabrics, as I had to make do with what I had. You will just have one fabric.)
Now take one E piece and one F piece. Place the fabrics right sides together and stitch down the right 13” side. Open and turn it so the fabrics are wrong side together. Press . Do the same for your other back piece.

Here is my piece E with piece F on top, right sides together
And here is one back piece turned right side out and pressed. Piece E is facing up, you can see piece F on the back.
Take your front piece and lay it right side up. Lay the back pieces on top, E side down. Line the back and front pieces up raw edge to raw edge. To do this you will have to overlap your two back pieces. Pin around the edge of the frame.

Here is the front of the frame and one side of the back ready to be pinned, right sides together long sides matching.
And here are both back pieces. You will notice an overlap of fabric in the middle. Measure down from the top of your frame one inch, mark. Stitch along the top edge of the frame. Now you will stitch around the other three sides, stopping and starting at the one inch mark. This will leave an opening for your dowel rod

This is what your dowel opening at the top of your frame will look like.
Turn frame right side out.
press
Now you want to make a ledge for your picture to sit on. You will stitch in the ditch between the piping cord and the fabric on the bottom of your inner square.
Go to your dowel rod pocket at the top of the frame. Take your dowel rod and ribbon (cut to your specified hanging length). Tie one end of the dowel rod with the ribbon. Push the untied edge through your open seam. Tie the ribbon to the other edge.

Insert your picture and hang!


Oilily

Nothing says Spring to me like the colors and prints from Oilily. Although, truth be told, I've always wished they made their kids clothing in adult sizes,as the colors and prints tend to be a even bolder than the adult. They don't have women's clothing up on their website, but it looks as if it is on the way. In the meantime I will have to make do with ogling the bags.


Wednesday, January 26, 2011

Dancers among us


Jordon Matter Photography's ongoing project Dancers Among Us totally feeds in to my dancer envy/fascination. The series started shooting in 2009 and now there are a ton of mind-blowing body contorting images.
Definitely take a minute today to scroll through the gallery. And then go stretch, because you will never be able to pick up your sandwich like this girl without stretching. Oh, and probably years of training. I guess in the end though, it all depends on how much you want that sandwich.


Pattern ID at the Kemper

I"m excited about an exhibition that is opening at the Kemper next week. It's called Pattern ID and it is 40 works by artists using pattern and dress as a form of identity in an increasingly globalized world.

I'm always interested in a fashion oriented exhibition, but with this one I am especially intrigued by the focus on prints. I'm sure you know by now that I am a print (and color!) fiend and the teaser pictures of the exhibit are definitely drawing me in.

The exhibit opens January 28th with a opening party from 5:30-7:30. I'm thinking it would be fun to get all dressed up and go, anyone with me?

Oh, you can see more about the exhibit at the Kemper's website, and also at the Akron Art Museum site.